
| Summary Prioritize safety first and shut off the power supply before you shut off the main water valve.Contain and remove accumulated water to minimize damage and prevent mold growth, which can start in as little as 24-48 hours.Temporary fixes are just temporary. Hire a C-36 licensed plumber for root cause resolution, proper repairs, and cleanup.Document everything for your homeowner’s insurance claim. Insulate pipes, monitor water pressure, address aging pipes, prevent clogs, and ensure proper installation to prevent pipe bursts. |
Immediate flooding due to a burst pipe can potentially cause severe water damage to your property. Structural damage to walls, floors and your belongings lead to a significant financial burden from repairs and potential mold remediation. It can cost you thousands of dollars. So, what to do when a pipe bursts?
Immediate Actions for Safety & Damage Control
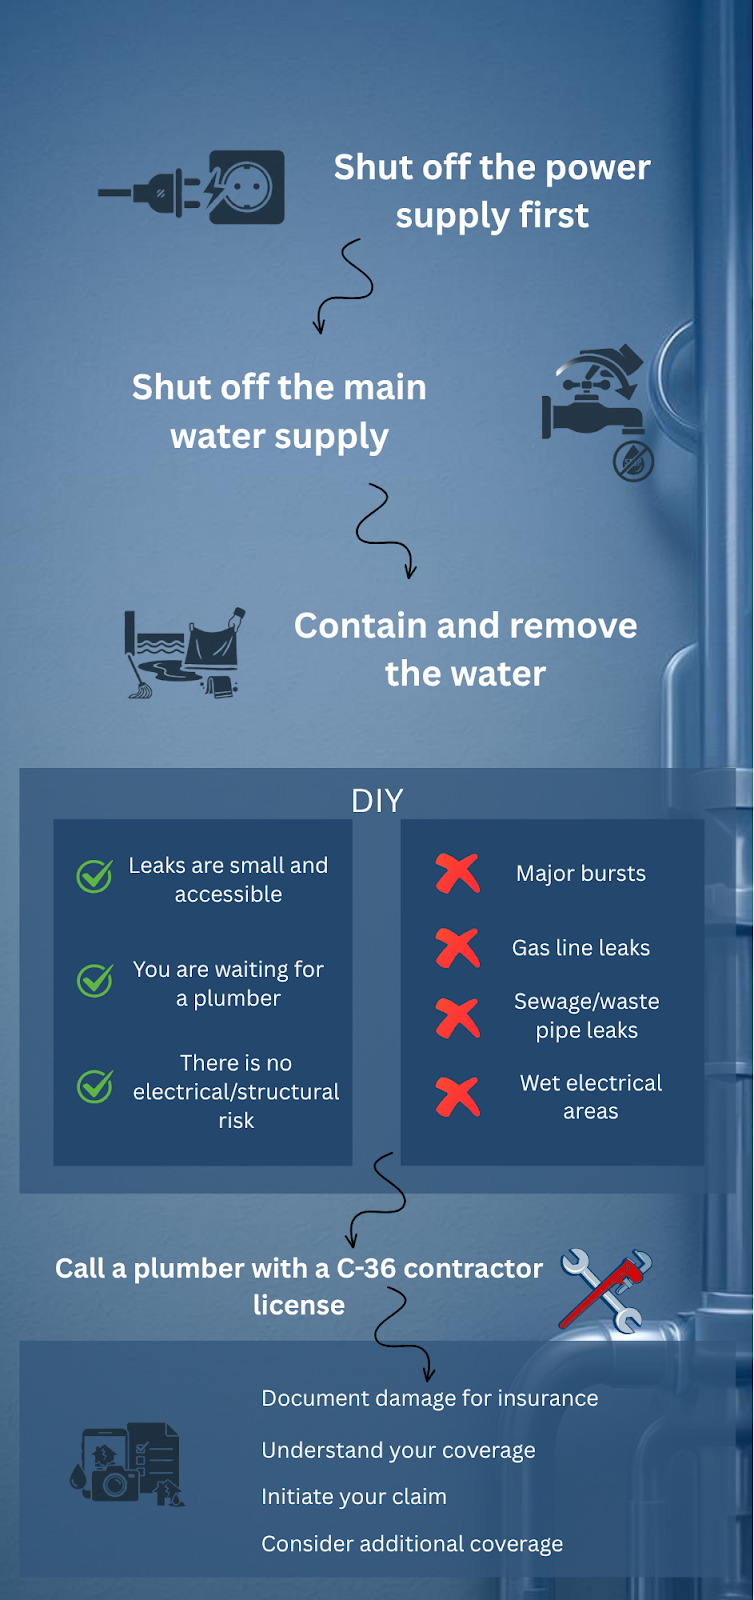
Shut Off Power Supply
Your first instinct may be to rush and shut off the main water supply. However, immediate safety should always come before preventing minor damage. Avoid touching any electrical device until you cut the power supply. Even if the leak is not near an appliance, an electrical outlet or the main electrical panel, shut off the electricity first. For situations like these, it’s wise to contact experienced plumbers in Simi Valley who can safely assess and resolve the issue.
Shut Off the Main Water Supply
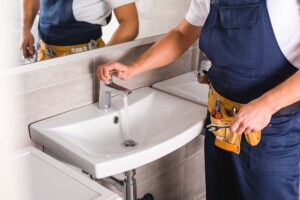
Stop the flow of water to prevent continuous flooding and minimize water damage. The main water shut-off valve is typically located in your home’s basement, utility closet, near the outside meter, or in a crawl space. Locate it and shut it off.
| Proactive Tip: Label your main water shut-off valve to ensure quick action during emergencies. Keep a diagram or photo of your main shut-off valve in an easily accessible location for emergencies. |
Open Faucets to Relieve Pressure
You have shut off the main water shut-off valve but residual water may still be in the pipes. Open both hot and cold faucets, especially on lower floors to drain the system and reduce pressure.
Contain the Water
Containing water is important to prevent further damage and inhibit mold growth. With no more water entering from the water pipe burst in house, containing and removing the accumulated water becomes a more straightforward task.
Remove Water
For larger volumes of floodwater in your home, use a wet/dry vacuum to remove the water quickly and effectively. Collect the remaining water using mops, old towels and buckets to soak up remaining moisture. If you have tarps, use them to create a barrier and protect unaffected surfaces.
Prioritize Valuables
Move all the water-sensitive and valuable items to a higher, dry area. Water can permanently damage electronics, important documents, books, photos, and furniture.
Assessing the Damage & Temporary Fixes
Assess the Leak Location and Severity
Next, identify the leak location and determine the extent of the problem.
Locate the Source
Listen to hissing or dripping sounds to locate a broken water pipe. Check for signs of moisture:
- Warped baseboardsÂ
- Bubbling paint or wallpaperÂ
- Puddles with no obvious sourceÂ
Assessing the Severity
| Signs of a minor leak | Signs of a major leak |
| Slow dripping | Water gushing/spraying |
| Single wet spot | Multiple rooms affected |
| No structural damage yet | Ceiling sagging or collapsing |
Identifying a Hidden Leak
Turn off all faucets and appliances that use water, then check your water meter. If the meter continues to move, you likely have a hidden leak.
Look for the following:
- Musty smellsÂ
- Mold or stainsÂ
- Warped floors/walls  Â
When to Consider a Temporary DIY Fix (and when NOT to)
| Temporary fixes can buy you hours, not days. These are emergency measures but they must be handled with caution, as improper fixes can worsen the problem, cause injuries and further damage. Always call a licensed plumber for permanent solutions. |
When DIY Might Work
Consider temporary fixes only when:
- Leaks are small and accessible.Â
- You are waiting for a plumber.
- There is no electrical/structural risk   Â
When to Avoid DIY
Get professional help immediately if you notice:
- Major burstsÂ
- Gas line leaksÂ
- Sewage/waste pipe leaksÂ
- Wet electrical areas Â
Common Temporary Repair
| Method | Best For | Required Tools and Materials | Steps | Works On | When to Avoid |
| Pipe Clamp | Small-moderate leaks | Commercial pipe clamp and wrench | Dry pipePosition gasket over leakTighten bolts evenly | Straight visible pipes | Bent pipes/joints |
| Rubber Patch + Clamp | Pinhole leaks | Rubber piece and hose clamp | Cover leakSecure with clamp (screw opposite leak) | Copper/PVC pipes | High-pressure lines |
| Epoxy Putty | Small cracks/holes | Plumbing epoxy and gloves | Knead puttyPress over dry leakCure as directed | Drain pipes/non-pressurized | Supply lines/hot pipes (>120°F) |
| Pipe Tape | Threaded joint leaks | Teflon tape | Dry threadsWrap clockwise 4-6xReconnect + tighten | Faucets/showerheads | Cracked pipes/soldered joints |
Calling in the Professionals
Contact a Qualified Plumber Immediately
You may control immediate damages with temporary fixes. However, only a licensed plumber can:
- Resolve the root cause of the problemÂ
- Ensure safe, code-compliant repairsÂ
- Assess your plumbing system for vulnerabilities
- Recommend upgrades or maintenance to prevent future emergencies Â
| Make sure you hire a plumber with a C-36 contractor license. |
Engaging Water Mitigation/Restoration Services
The plumber has fixed the root cause and your plumbing system is working. However, there might be some invisible water damage. Hidden moisture can cause:
- Mold growth (within 24-48 hours)
- Structural weakeningÂ
- Permanent stains on walls and furnishingsÂ
- Electrical hazards Â
Call a restoration company immediately if you observe:
- Standing water over 1 inch deep
- Sewage contamination (black water)Â Â
- Musty odors (indicating mold risk)
- Water absorbed into walls, insulation, or carpetsÂ
| Make sure you hire a firm with Inspection Cleaning and Restoration Certification (IICRC). |
Cleanup, Drying, and Damage Inventory
Thorough Water Removal and Drying
Water Extraction
Professionals use industrial pumps and wet vacuums to remove standing water quickly. Sewage contamination requires specialized handling to prevent health hazards.
Moisture Detection
Identifying hidden damp areas behind under floors or behind walls requires infrared cameras. Moisture meters measure saturation levels in drywall, wood, concrete and other materials.
Documenting Damage for Insurance
Maintain proper documentation to file an insurance claim for water damage. You need to provide detailed evidence to assess the extent of the damage and process your claim efficiently. Take the following steps:
- Take photos and videos of the burst pipe, appliance failure, standing water, damaged areas, structural damage, mold, discoloration and sewage contamination. Â
- Keep affected furniture, electronics or personal items until an insurance adjuster has inspected them.
- Maintain a detailed inventory list of affected items.
- Save all repair and restoration receipts. Â
- Obtain plumber’s assessment, water damage inspection, mold testing and other professional reports.Â
- Report the claim immediately and maintain clear communication with your insurance provider.Â
Navigating Your Homeowners Insurance Claim
Before filing a claim, review your homeowners insurance policy to determine what is covered and what is not.
Understanding Coverage
A typical policy covers:
- Sudden and accidental damage (such as a pipe bursting unexpectedly)
- Structural damage (walls, floors, ceilings)Â
- Personal property damage (furniture, electronics, clothing)
- Additional Living Expenses (ALE) if your home is uninhabitable.
A typical policy does not cover:
- Gradual leaks due to long-term pipe corrosionÂ
- Lack of maintenance such as ignored plumbing issuesÂ
- Sewer backups
- Flood damage Â
Initiating Your Claim
The sooner you file, the faster your claim can be processed. Insurance claim initiation includes:
- Contacting your insurer and providing basic details
- Submitting required documents such as photos and videos of damage, plumber’s report, restoration company’s estimate and inventory of damaged items.Â
- Inspection of damage by claims adjuster.Â
Make sure you keep all communication records such as emails, calls, and claim reference numbers.
Working with Your Adjuster
An insurance adjuster assesses the damage and determines payout eligibility.
- Be present during the adjuster’s visit and point out all damages.Â
- Don’t exaggerate damage
- Don’t discard damaged items before inspection.
- Don’t accept a lowball offer.
- Compare the settlement with contractor’s estimates.
Considering Additional Coverage
In case the damage is not covered, reevaluate your policy to prevent future gaps in coverage.
- Get water backup coverage to cover damage from sewer or drain backups. Â
- Get service line coverage to protect against burst pipes outside the home.Â
- Consider flood insurance to cover natural flooding.Â
- Increase coverage limits if repairs exceeded your policy limits. Â
Stopping Future Bursts
While Simi Valley enjoys a mild climate, winter nights can occasionally drop below freezing. The following are the common reasons behind pipe bursting in the region:
- Freezing temperatures
- Aging and corroded pipes
- High water pressureÂ
- Clogs and blockagesÂ
- Poor installation or DIY repairsÂ
Freezing Temperatures
Simi Valley experiences mild winters but frozen pipes are still a concern. To prevent pipe bursts due to freezing temperature:
- Wrap exposed pipes with foam insulation
- Install frost-proof hose bibsÂ
- Let faucets drip during cold alertsÂ
- Seal crawl space vents with removable insulation panels during cold snapsÂ
Aging and Corroded Pipes
Old homes in Simi Valley with galvanized steel pipes (common in pre-1980s builds) or early thin-wall copper pipes are at high risk of:
- Sudden bursts from internal corrosion buildupÂ
- Pinhole leaks causing hidden wall damage
- Reduced water flow from mineral deposits
To prevent this:
- Inspect exposed pipesÂ
- Check water pressure
- Consult a licensed plumber to replace damaged sections or repipe your home.
High Water Pressure
Normal pressure should be 40-80 PSI. Excess pressure stresses joints and leads to bursts. Install a pressure regulator to prevent pipe bursts caused by high water pressure.
Clogs and Blockages
Tree root invasions and mineral buildup contribute to frequent pipe clogs and sewer line damage. Non-flushable debris such as wipes, hygiene products, and grease can also clog pipes.
- Consider annual hydro-jetting in a house with large trees near sewer lines.
- Install strainers in showers and sinks to catch hair and debris.Â
- Use a plunger or drain snake for minor clogs.Â
- Call a licensed plumber for recurring issues.Â
Poor Installation or DIY Repairs
Incorrect pipe sizing, weak solder joints, or overtightened fittings can also cause pipe bursts. Always hire a licensed plumber (C-36 in CA) for installations.
Conclusion
Most pipe bursts can be prevented with proper installation and maintenance. A burst pipe can cause extensive damage which can often be avoided through quick action and timely professional intervention. Always hire a C-36 licensed plumber for all your plumbing needs.
FAQs
How quickly can mold grow after a burst pipe?
Mold can begin growing within 24–48 hours after a burst pipe.
Should I try to fix the pipe myself?
It depends on the severity of the leak, your skill level, and safety risks. You can temporarily fix small, accessible leaks when you have the right tools and there are no safety risks. Otherwise, hire professionals.
Will my homeowner’s insurance cover the damage?
A typical homeowner’s insurance does cover sudden, accidental pipe bursts, resulting water damage, mold remediation, and additional living expenses. Contact your insurer for complete details.
What’s the most common cause of burst pipes?
The most common cause of burst pipes is freezing temperatures in regions with harsh winters. Other common causes include:
- Aging and corroded pipes
- High water pressureÂ
- Clogs and blockagesÂ
- Poor installation or DIY repairsÂ
How can I find my main water shut-off valve?
You can locate your main water shut-off valve in a few common places: typically in your home’s basement, utility closet, near the outside meter, in a crawl space, or sometimes near the water heater or under the kitchen sink. It’s often found where the main water line enters your house from the street side.