- Replace Faucet When: Persistent leaks, low pressure, corrosion, noisy handles, or outdated fixture.
- Preparation Matters: Have the right tools and choose a faucet that fits your sink and style.
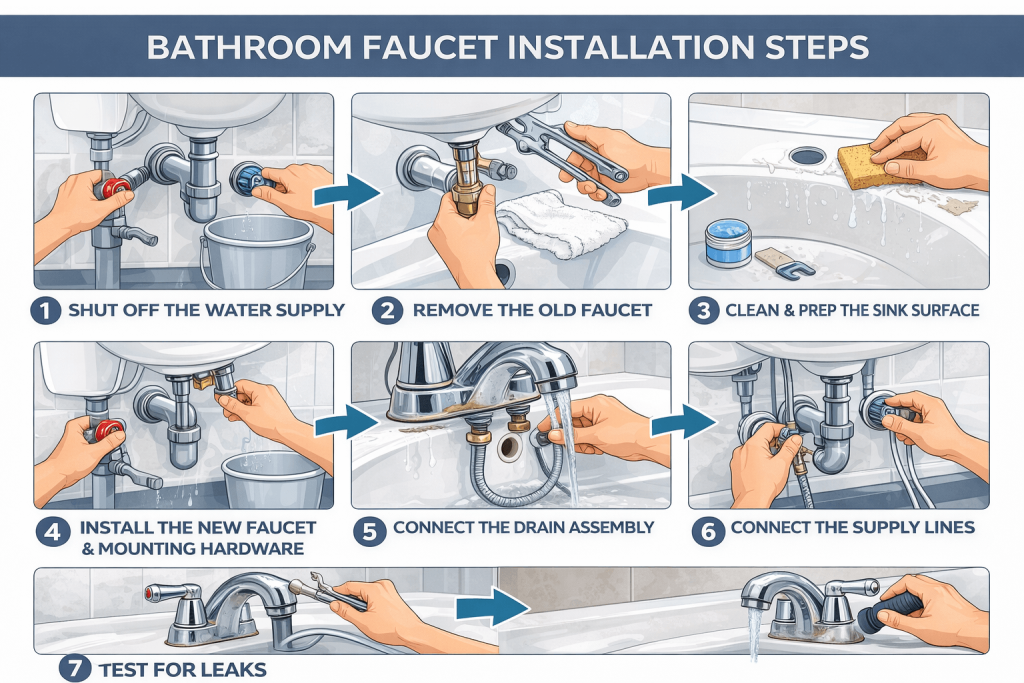
- Installation Steps: Shut off the water, remove the old faucet, clean the surface, install the new faucet, connect the drain and supply lines, and test for leaks.
- DIY vs Professional: DIY is possible but may take longer and carries a higher risk; professionals are faster, safer, and include warranties.
- Know When to Call a Plumber: Stuck valves, corroded pipes, old plumbing, repeated leaks, or complex setups.
- Long-Term Benefit: Proper installation ensures leak-free performance and prolongs faucet life.
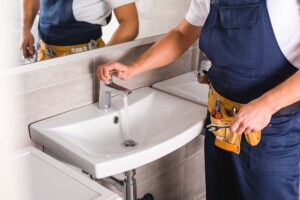
Tired of that annoying drip-drip-drip coming from your bathroom faucet? Or maybe the water pressure has dropped so low that even brushing your teeth feels frustrating. You’ve probably tried cleaning it, but the corrosion, mineral buildup, or outdated design just won’t go away.
At this point, replacing the faucet seems like the obvious solution. After all, it looks simple in quick online tutorials. But once you actually get under the sink, things can become more complicated than expected—tight spaces, stuck nuts, old valves, or hidden leaks can quickly turn a “30-minute job” into a much longer project.
The good news is that understanding the process beforehand makes a big difference. In this guide, you’ll learn when it’s time to replace your faucet, what to check before starting, and what challenges homeowners often face during installation.
What are the signs that it’s time to replace your bathroom faucet?
Sometimes a faucet doesn’t completely stop working — it just keeps giving small signs that something isn’t right. If you’ve been noticing a few annoying issues lately, your faucet might be telling you it’s time for a replacement.
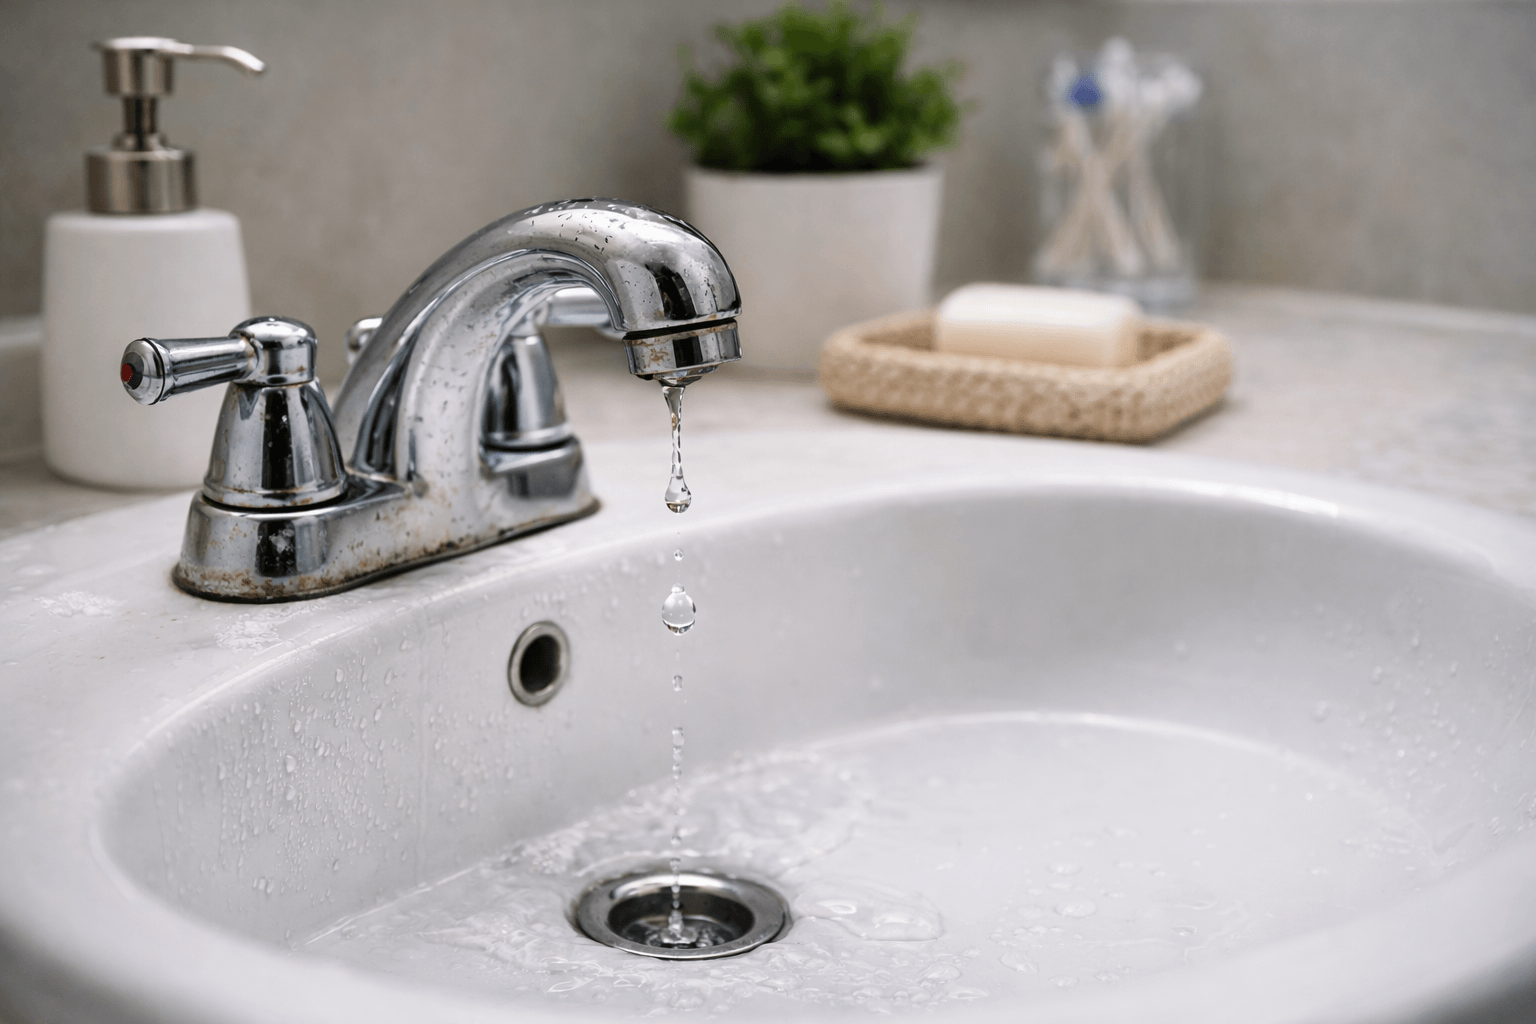
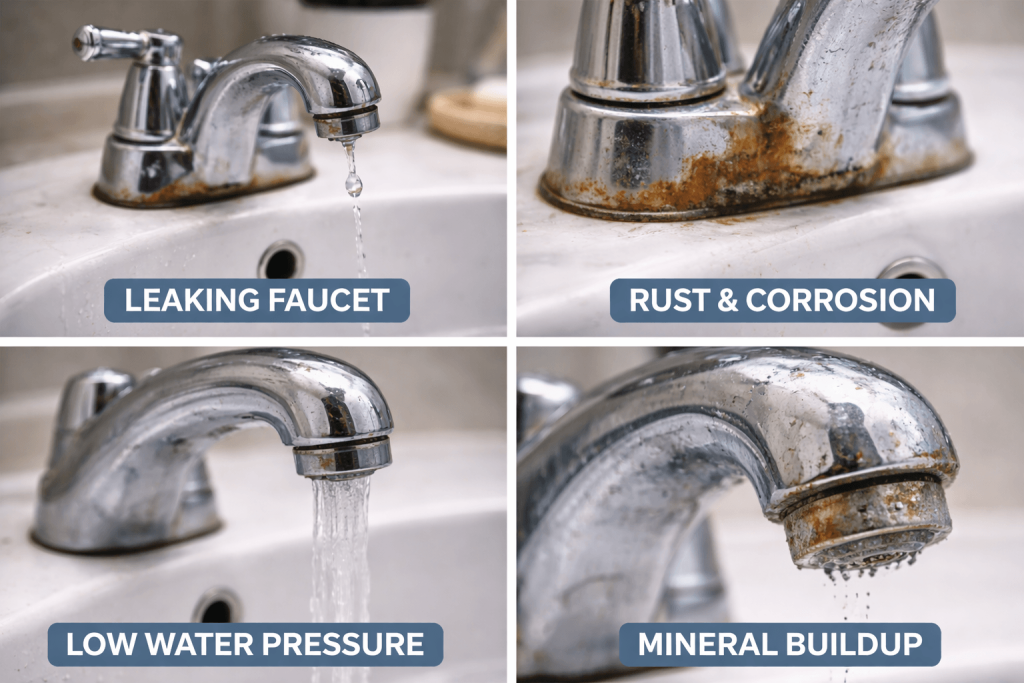
1. Constant Drips or Leaks
That steady drip… drip… drip isn’t just annoying. If replacing washers or O-rings hasn’t fixed the problem, the internal parts may be worn out. Over time, this can waste a surprising amount of water and increase your utility bill.
If you’re dealing with small leaks and want to fix them temporarily before replacing your faucet, check out our guide on Quick DIY Plumbing Repair: Tips To Prevent Water Loss for simple solutions you can try at home.
2. Rust, Corrosion, or Mineral Buildup
If you see rust spots or greenish-blue stains around the faucet, the protective finish may be breaking down. Mineral buildup can also clog internal parts and affect water quality.
3. Low Water Pressure
If the water flow is weak or inconsistent even after cleaning the aerator, the faucet itself might be clogged or deteriorating internally.
4. Frequent Repairs
Calling a plumber repeatedly for leaks, loose handles, or worn parts can quickly add up. At that point, replacing the faucet is usually the more cost-effective option.
5. Noisy or Hard-to-Turn Handles
If your faucet squeaks, whistles, or needs extra force to turn on and off, the internal cartridge may be failing.
6. Outdated or Aging Fixture
Most bathroom faucets last around 15–20 years. If yours is older or looks worn out, replacing it can prevent sudden failures and give your bathroom a fresh, updated look.
| Quick Tip: If you’re already renovating your bathroom, it’s the perfect time to upgrade the faucet as well. It saves time, effort, and potential plumbing work later. |
What You Need Before You Start
Before diving under the sink, let’s make sure you have everything you need. Having the right tools and knowing what kind of faucet to buy makes the whole process much easier — and saves you from frustrating mistakes.
Tools Required

You don’t need a full toolbox, just a few essentials:
- Wrenches: Adjustable wrench (crescent wrench) and a basin wrench for those tight nuts under the sink.
- Pliers: Channel-lock or groove-joint pliers.
- Screwdrivers: Both Phillips and flathead.
- Sealants: Plumber’s putty or silicone caulk, plus Teflon tape (PTFE) for watertight connections.
- Cleanup: A small bucket and towels to catch drips.
- Optional: Flashlight or headlamp to see under the sink.
How to Choose the Right Replacement Faucet
Picking a faucet isn’t just about style, it’s about fit and function:
- Check your sink holes: Count the holes (1-hole, 3-hole centerset, 3-hole widespread). A deck plate can cover extra holes if needed.
- Measure clearance: Make sure the spout doesn’t hit windows, cabinets, or mirrors above the sink.
- Mounting type: Deck-mounted faucets attach to the sink/countertop; wall-mounted faucets attach above the sink.
- Spout style & height: High-arc faucets are great for filling pots but may splash in shallow sinks; low-arc faucets are better for tight spaces.
- Features: Pull-down or pull-out sprayers, touchless sensors, or multiple spray settings make daily use easier.
- Finish & material: Brushed nickel hides spots well; chrome is classic and affordable; while brass, gold, or matte black add style. Always choose durable materials, such as solid brass or stainless steel, with ceramic disc valves to prevent leaks.
What Steps Are Involved in Bathroom Faucet Installation?
Before you start taking things apart, it helps to understand what the installation process actually involves. Here’s a simple overview of how bathroom faucet installation works, so you know what to expect before getting under the sink.
Step 1: Shut Off the Water Supply
Start by locating the hot and cold shut-off valves under the sink. Turn them clockwise to stop the water flow. Then open the faucet handles to release pressure and drain any remaining water from the lines.
Step 2: Remove the Old Faucet
Next, disconnect the hot and cold supply lines using a wrench. After that, loosen the mounting nuts underneath the sink that hold the faucet in place. Once everything is detached, lift the old faucet straight up and out from the top of the sink.
Step 3: Clean & Prep the Sink Surface
Before installing the new faucet, take a moment to clean the area around the sink holes. Remove old plumber’s putty, silicone, and any debris so the new faucet can sit flush and create a proper seal.
Step 4: Install the New Faucet & Mounting Hardware
Place the new faucet into the sink holes from the top. Then, from underneath the sink, secure it using the correct order of hardware: rubber washer → brass washer → locknut. Tighten everything carefully so the faucet stays stable.
Step 5: Connect the Drain Assembly
If your faucet includes a pop-up drain, install it now. Connect the stopper, pivot rod, and clevis strap according to the manufacturer’s instructions so the drain opens and closes properly.
Step 6: Connect the Supply Lines
Attach the hot and cold water supply lines to the shut-off valves. Remember: hot goes on the left, cold on the right. Hand-tighten the connections first, then give them a gentle turn with a wrench—avoid overtightening.
Step 7: Test for Leaks
Finally, slowly turn the water supply back on. Run both hot and cold water and carefully check all connection points under the sink to make sure there are no drips or leaks.
| Note: These steps give you a general idea of the process, but every bathroom setup is a little different. If you want the job done quickly and without the risk of leaks, a licensed plumber can usually complete the installation in under 90 minutes. |
How Much Does Bathroom Faucet Installation Cost?
One of the biggest questions homeowners ask is simple: “How much will it cost to replace my bathroom faucet?”
The answer usually depends on whether you decide to do it yourself or hire a professional plumber. While DIY may look cheaper at first, the real cost also includes your time, tools, and the risk of mistakes.
Here’s a quick comparison to help you understand the difference:
| Option | Cost | Time | Risk |
| Budget DIY | $50–$80 | 2–4 hours | High if inexperienced |
| Mid-range DIY | $120–$250 | 2–4 hours | Medium |
| Professional Plumber | $150–$300 | Under 90 minutes | Very low (professionally installed) |
At first glance, DIY might seem like the cheaper option. But when you factor in your time, potential mistakes, and the possibility of needing an emergency plumber later, professional installation can often end up costing the same—or even less in the long run.
7 Situations Where You Should NEVER DIY a Faucet Replacement
Replacing a bathroom faucet often looks like a quick weekend project. But sometimes, what seems simple can turn risky if the plumbing setup isn’t in good condition. Before you grab your tools, check if any of these situations apply to you.
1. Your Shut-Off Valves Are Stuck or Corroded
If the shut-off valves under your sink haven’t been turned in years, they may be stuck or rusted. Forcing them can be risky.
What can go wrong: A damaged valve can suddenly start leaking or fail completely, turning a small repair into a bigger plumbing problem.
2. You Notice Rust or Green Corrosion on Pipes
Rust or green buildup around pipes is a sign that the metal may already be weakening.
What can go wrong: Disturbing corroded pipes during installation can create leaks that are difficult to notice at first but may damage cabinets or walls over time.
3. Your Home Has Older Plumbing
Homes with plumbing that’s 20+ years old may have outdated materials or fittings that don’t handle modern connections well.
What can go wrong: Older pipes can break or crumble when loosened, which may require additional repairs.
4. You’ve Already Tried the Installation and It’s Still Leaking
If you attempted the replacement and water is still dripping, something may not be sealed or aligned correctly.
What can go wrong: Repeated tightening attempts can damage threads or fittings, worsening the problem.
5. You Don’t Have the Right Tools
Faucet mounting nuts sit in tight spaces behind the sink. Without tools like a basin wrench, reaching them properly can be difficult.
What can go wrong: Using the wrong tool in a tight space can cause slips that may damage pipes or the sink.
6. The New Faucet Doesn’t Match Your Sink Holes
Bathroom faucets come in different configurations such as single-hole, centerset, or widespread. If your new faucet doesn’t match the existing holes, installation becomes more complicated.
What can go wrong: Modifying sink holes requires special tools and techniques to avoid damaging the sink surface.
7. You’re Replacing Multiple Parts at the Same Time
Changing the faucet, drain assembly, and supply lines together adds more connections and adjustments.What can go wrong: More connections mean more chances for small leaks if something isn’t installed correctly.
| Important: If even one of these situations sounds familiar, it may be worth getting a professional opinion first. A quick inspection can help prevent hidden leaks, damaged fixtures, or costly repairs later. Need help or want a quick assessment? Our licensed plumbers can evaluate your setup and provide an upfront quote before any work begins. |
Why Hire a Professional Plumber for Faucet Installation?
At first glance, replacing a bathroom faucet might seem like a simple DIY task. But once you start working under the sink, tight spaces, stubborn fittings, and hidden plumbing issues can quickly make the job more complicated than expected. That’s why many homeowners prefer to trust experienced professionals.
1. Done right the first time
A professional plumber knows exactly how to install the faucet correctly, preventing loose fittings, leaks, or repeated fixes later.
2. The right tools for the job
Professionals use specialized plumbing tools designed for tight spaces under sinks. This helps avoid common DIY problems like cracked sinks, damaged supply lines, or stripped mounting nuts.
3. Licensed and insured work
When you hire a licensed plumbing team, you’re protected. If anything unexpected happens during the installation, you’re covered.
4. A full plumbing check while we’re there
During installation, professionals can also inspect shut-off valves, supply lines, and the drain assembly to make sure everything is working properly.
5. Warranty on labor
Most professional installations include a labor warranty, giving you peace of mind long after the job is done.
Join 500+ homeowners who trust Sketchley Mason Plumbing for reliable bathroom plumbing upgrades.
| Prefer a Stress-Free Faucet Installation? Instead of dealing with tight spaces, stubborn fittings, or hidden plumbing issues, let the professionals handle it. Our experienced team at Sketchley Mason Plumbing installs bathroom faucets quickly and correctly—using the right tools and techniques to prevent leaks, damage, or repeat repairs. |
Conclusion:
By now, you probably have a much clearer idea of what bathroom faucet installation actually involves. At first, it may seem like a quick and simple project, but as you’ve seen, small details—tight spaces, old valves, or hidden plumbing issues—can quickly make the job more complicated than expected.
If everything under your sink is in good condition and you have the right tools, replacing a faucet can be a manageable DIY task. But if you notice signs like corroded pipes, stuck shut-off valves, or persistent leaks, it’s often safer to let a professional handle the installation. Fixing small issues early can prevent bigger and more expensive problems later.The goal is simple: a faucet that works perfectly, doesn’t leak, and lasts for years. Need help with your bathroom faucet installation? Our team at Sketchley Mason Plumbing can inspect your plumbing, recommend the right solution, and install your faucet quickly and correctly.
FAQs
Can I replace a bathroom faucet myself, or should I hire a plumber?
Many homeowners can replace a faucet themselves if the plumbing is in good condition and they have the right tools. However, if you notice stuck shut-off valves, corrosion, or leaks after installation, it’s safer to have a professional plumber handle the job.
How much does it cost to have a plumber install a bathroom faucet?
Most plumbers charge $150–$300 for labor, depending on the complexity of the installation. Hiring a professional can help prevent leaks, damaged fixtures, or costly repairs later.
How long does it take to replace a bathroom faucet?
A DIY replacement can take 2–4 hours, especially if you’re doing it for the first time. A professional plumber can usually complete the installation in under 90 minutes.
What tools are needed to replace a bathroom faucet?
Common tools include a basin wrench, adjustable wrench, pliers, screwdrivers, plumber’s putty or silicone caulk, and Teflon tape. Without the proper tools, the installation can become much more difficult.
When should I call a plumber for faucet replacement?
You should consider calling a plumber if your shut-off valves are stuck, pipes show corrosion, the faucet doesn’t match your sink holes, or the installation keeps leaking. A professional inspection can quickly identify and fix the problem.